Configuring Deployment Service Account in GCP
Overview
This guide walks you through setting up a Google Cloud Platform (GCP) Service Account for Terraform Cloud deployments using OIDC (OpenID Connect) via Workload Identity Federation (WIF). This setup allows Terraform Cloud to securely authenticate to GCP without relying on long-lived service account keys, ultimately enabling short-lived, scoped credentials per workspace.
✅ Before you begin: Ensure you have a GCP project available and sufficient permissions to create service accounts and manage IAM.
Step 1: Create and Configure the Service Account
-
Log in to your GCP account.
-
In the left-hand menu, go to:
IAM & Admin → Service Accounts -
Click Create Service Account, and fill in:
- Name:
terraform-deployer - Description: (optional)
- Click Create and Continue
- Name:
-
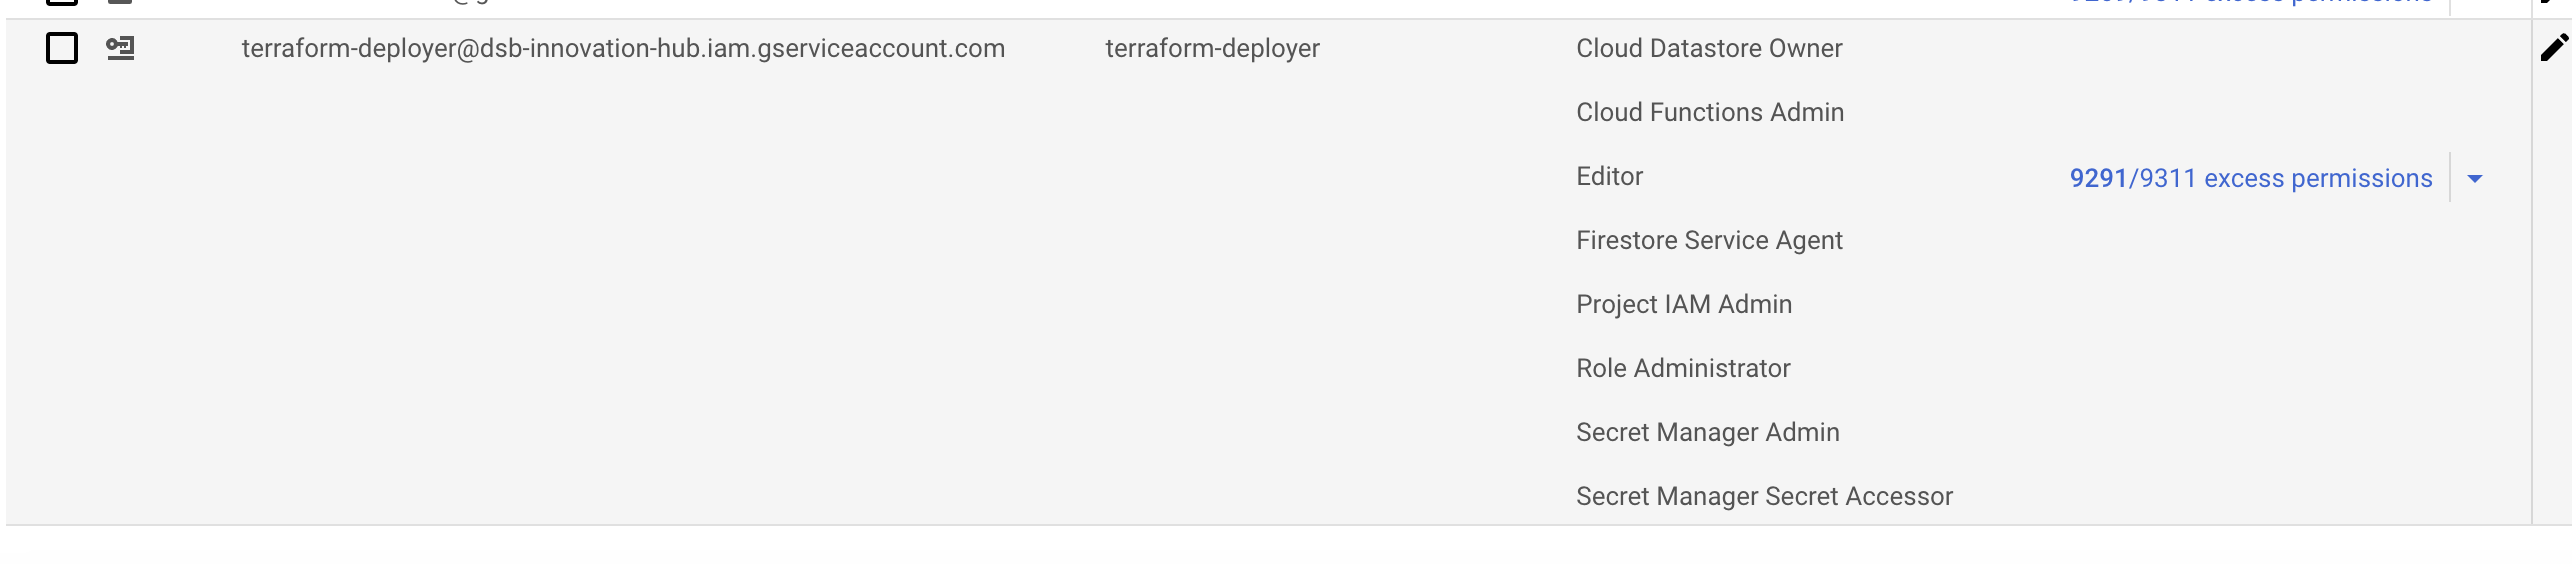
Grant the following roles to the service account:
EditorProject IAM AdminRole AdministratorSecret Manager AdminSecret Manager Secret AccessorIAM Service Account Token Creator
-
Under Grant users access to this service account, leave it blank and click Done.
Step 2: Configure Workload Identity Federation
-
In the GCP Console, go to IAM & Admin → Workload Identity Federation
-
Click Create Pool and enter the following:
- Pool Name:
Terraform Cloud - Pool ID:
terraform-cloud - ✅ Check the box: Enabled Provider
- Pool Name:
-
In the same flow, add a new provider:
- Provider Type:
OIDC - Provider Name:
default - Issuer URL:
https://app.terraform.io - Audiences: Select
Default Audience
- Provider Type:
-
Configure Attribute Mappings:
Google Attribute OIDC Assertion attribute.terraform_full_workspaceassertion.terraform_full_workspacegoogle.subassertion.subattribute.terraform_workspaceassertion.terraform_workspace_id -
Add Attribute Condition:
assertion.terraform_organization_name == "DSB" -
Click Create to finalize the pool and provider.
Step 3: Grant Access via Impersonation
-
After the pool and provider are created, click Grant Access.
-
Choose Grant access using service account impersonation.
-
Select the previously created service account (
terraform-deployer). -
Add the Terraform Workspace Principal:
- Use your workspace ID to define the principal.
- Example format:
principalSet://iam.googleapis.com/projects/<project-number>/locations/global/workloadIdentityPools/terraform-cloud/attribute.terraform_workspace_id/<workspace-id>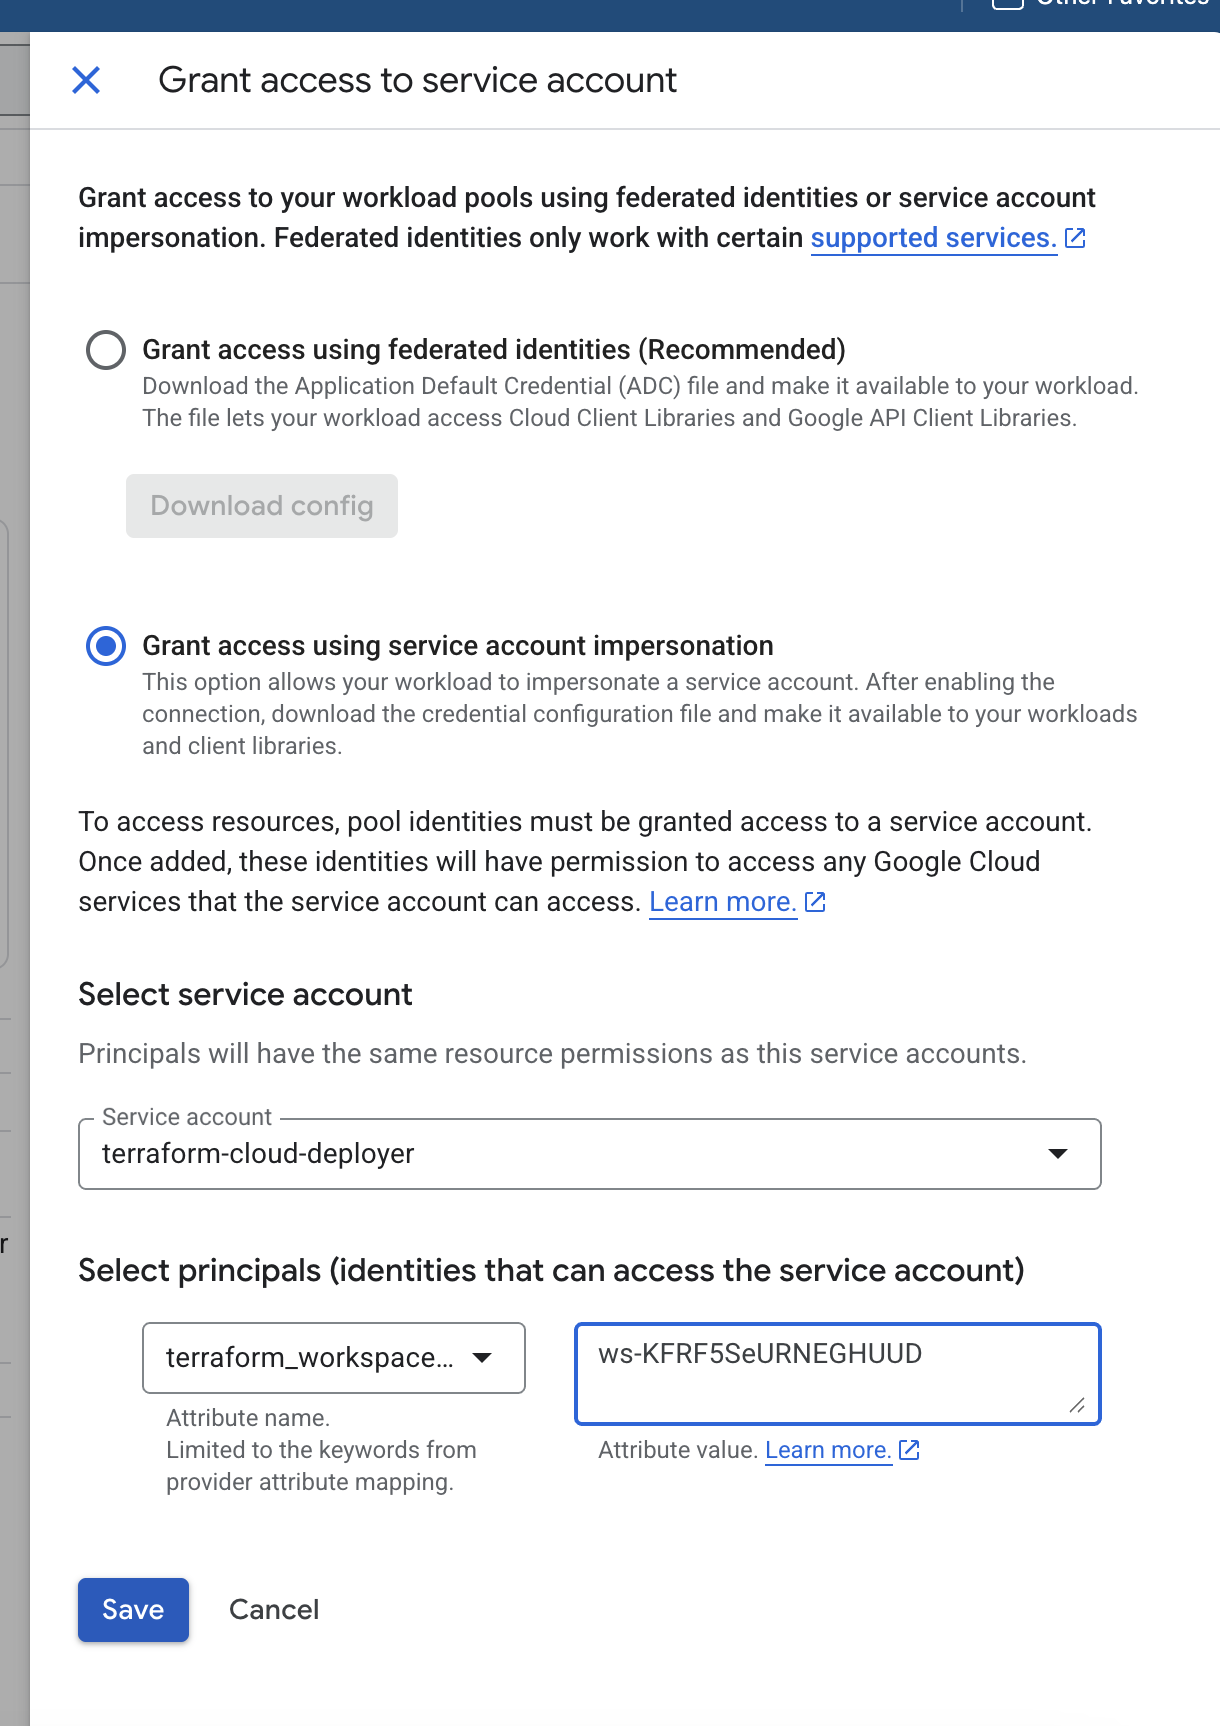
With this setup complete, Terraform Cloud will now be able to authenticate to GCP using OIDC and impersonate the terraform-deployer service account during runs — without the need for storing or rotating service account keys.
You can now move on to configuring your Terraform provider and environment variables.