Creating & Configuring Jenkins Pipeline
Step 1: Configure Access Token in Gitea
-
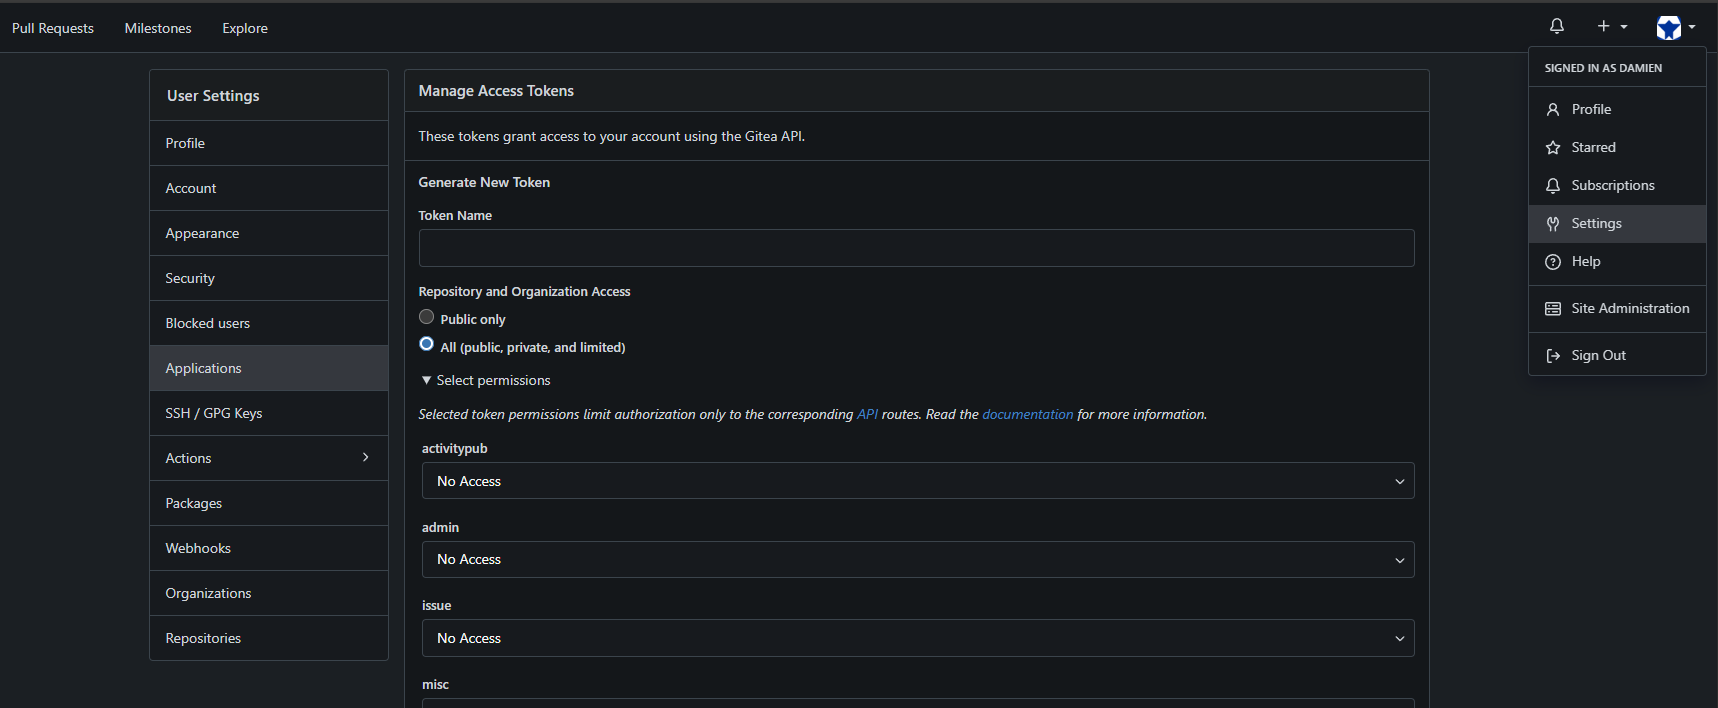
In Gitea, click on your user avatar at the top right, then select Settings > Applications.
-
Enter a token name (e.g.,
Jenkins), set it toPrivate, and select all permissions as READ/WRITE. Click Generate Token.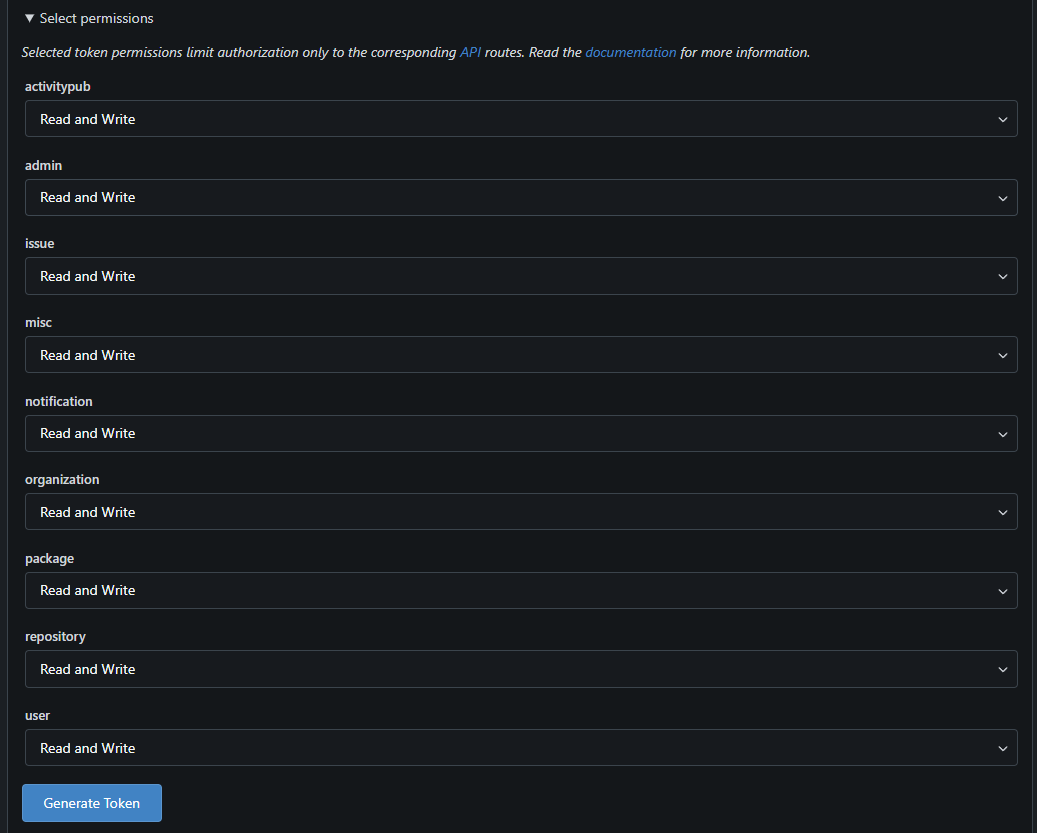
-
Copy the token and store it in a secure place. This token will be used for Jenkins authentication.
Step 2: Install Required Plugins in Jenkins
-
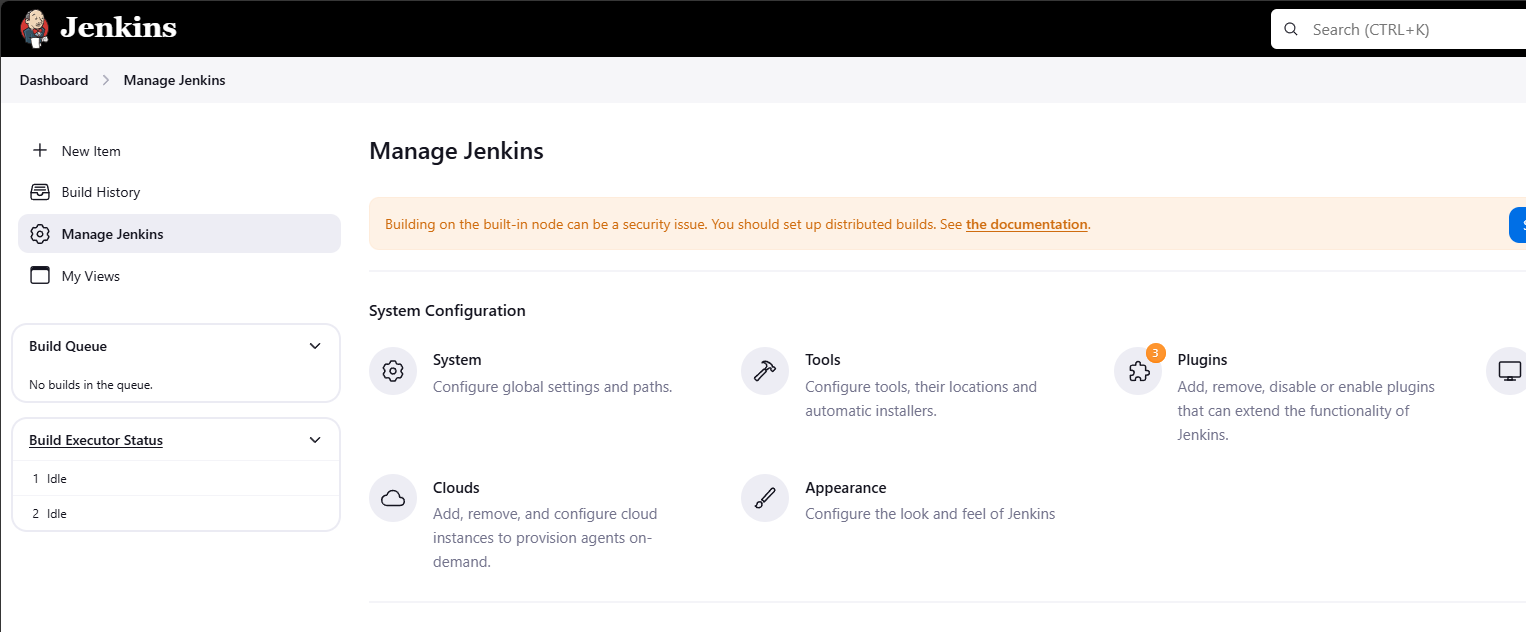
Log into Jenkins. From the Dashboard, click Manage Jenkins > Manage Plugins.
-
Under Available Plugins, search for and install the following:
- Gitea
- SonarQube Scanner
- Prometheus Metrics

Step 3: Create Jenkins Pipeline
-
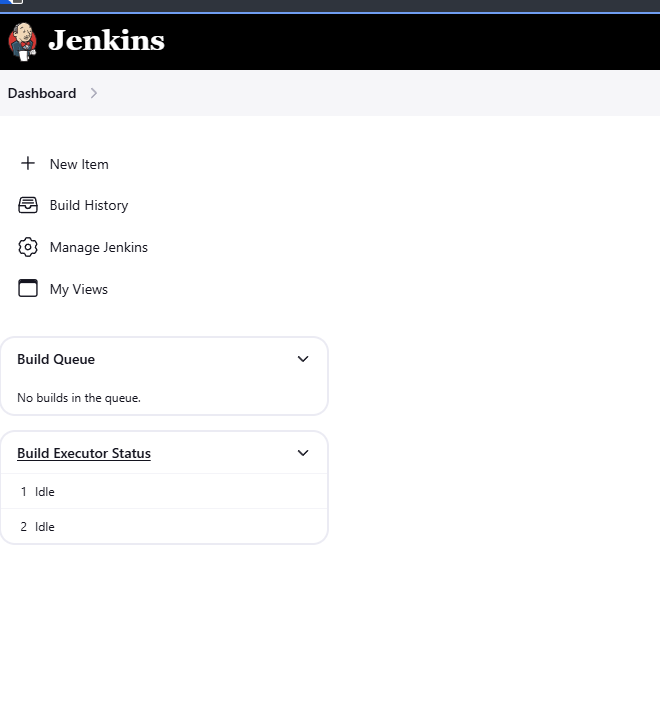
From the Jenkins Dashboard, click New Item.
-
Select Organization Folder and name it (e.g.,
OWASP Juice Shop Pipeline).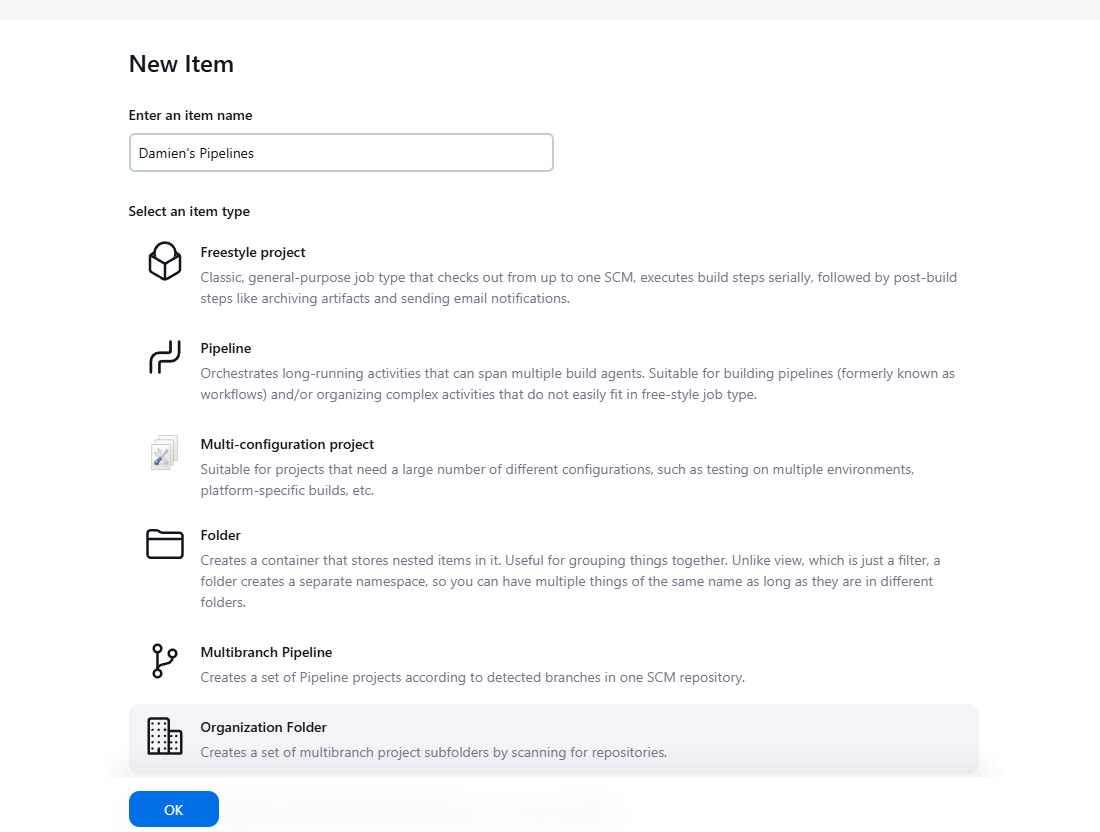
-
Scroll down to Repository Sources and select Gitea Organization.
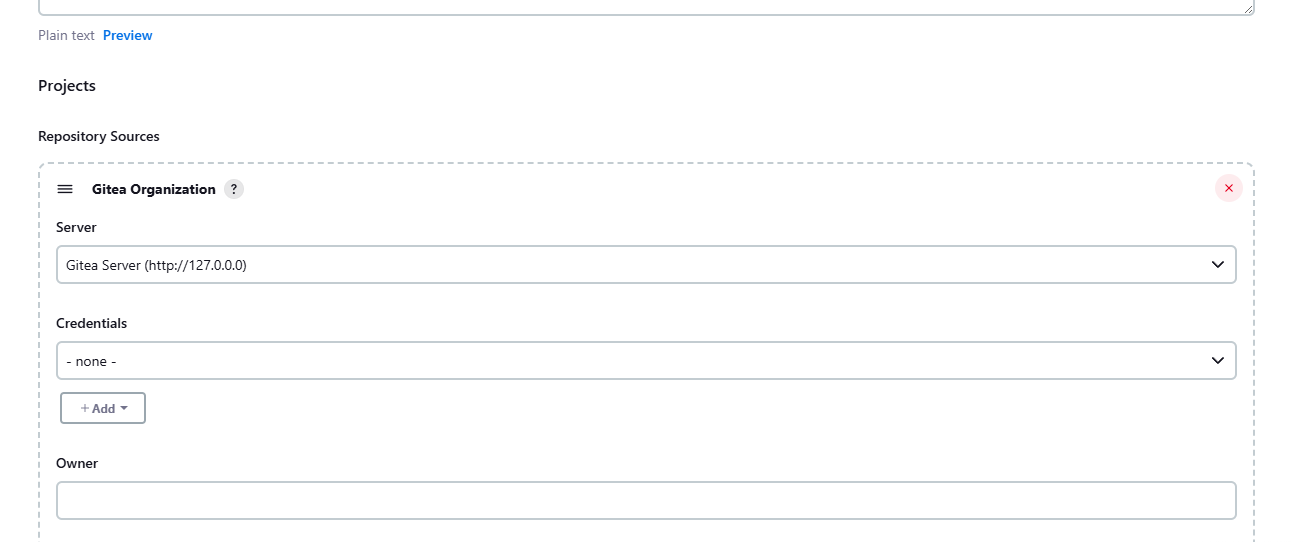
-
Under Credentials, click Add. Select the organization folder name, set the Kind to Gitea Personal Access Token (PAT), and paste the token generated from Gitea.
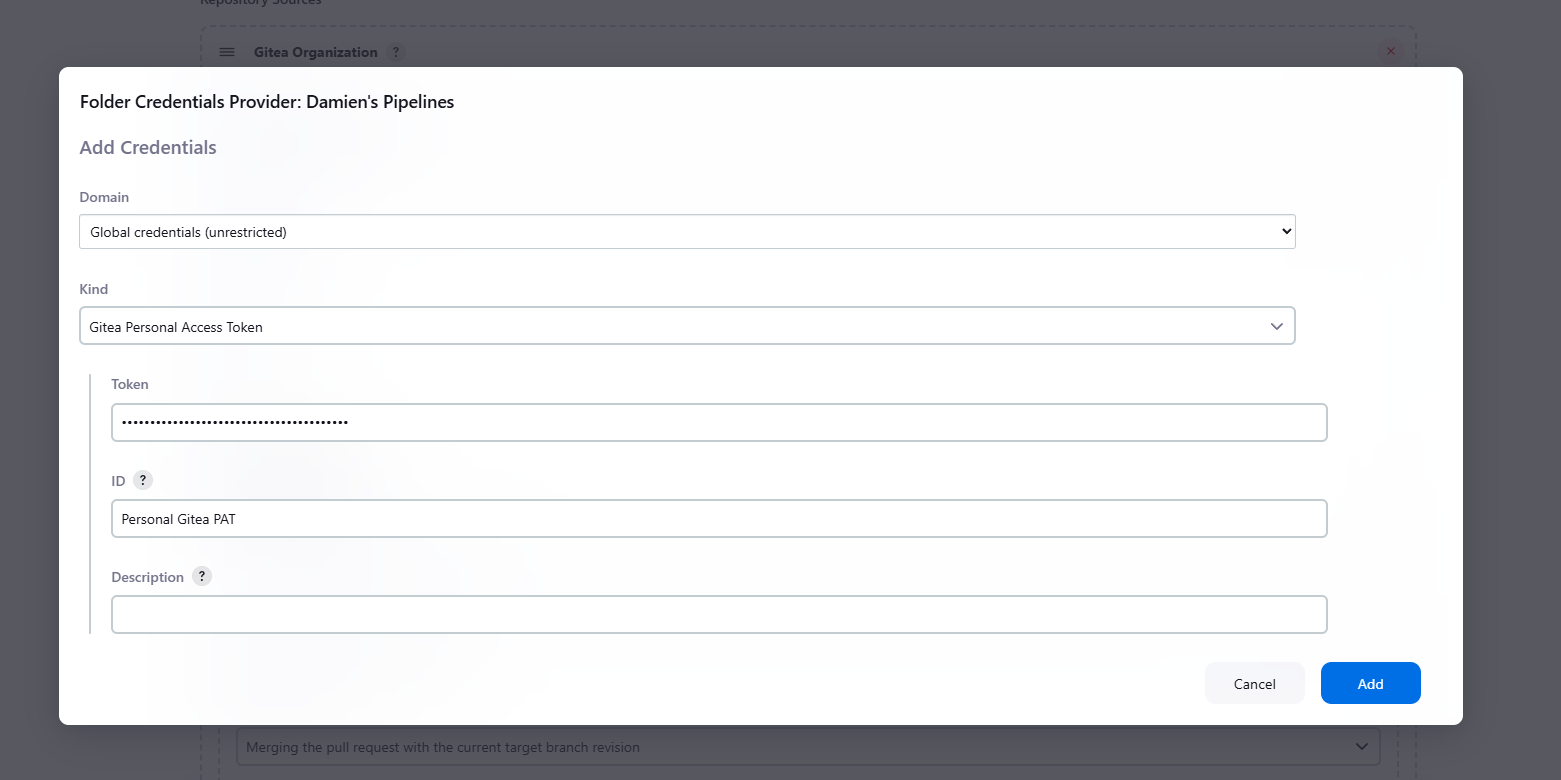
-
Set the Owner to your Gitea username, and then click Apply and Save.
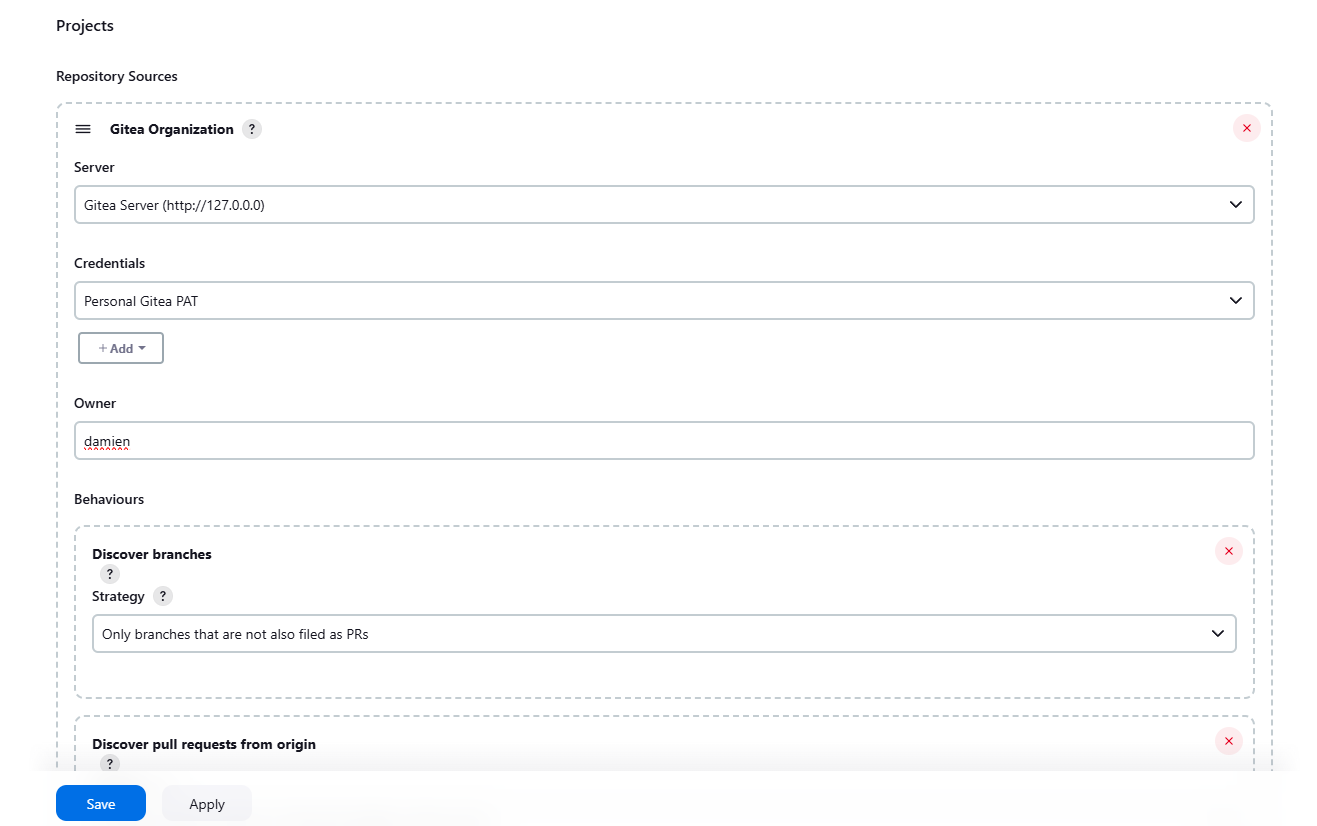
Step 4: Configure Webhook in Gitea
-
In Jenkins, go to Manage Jenkins > Configure System. Scroll down to Gitea Servers and add your Gitea server details.
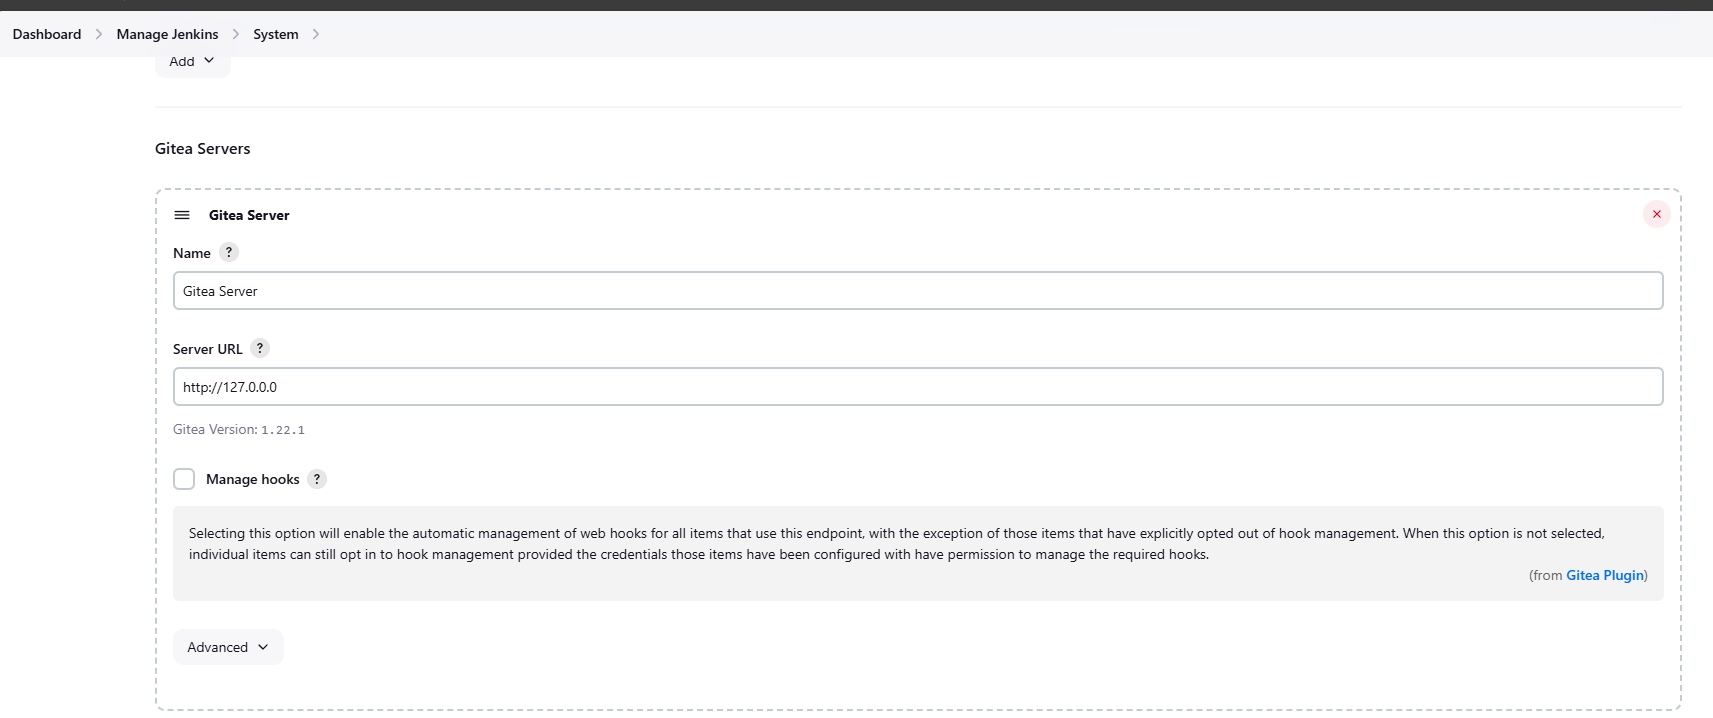
- Discover branches: Only branches filed as PRs or master/main branch.
- Discover pull requests from origin: Both the current pull request revision and the pull request merged with the current target branch revision.
-
Click Apply and Save.
-
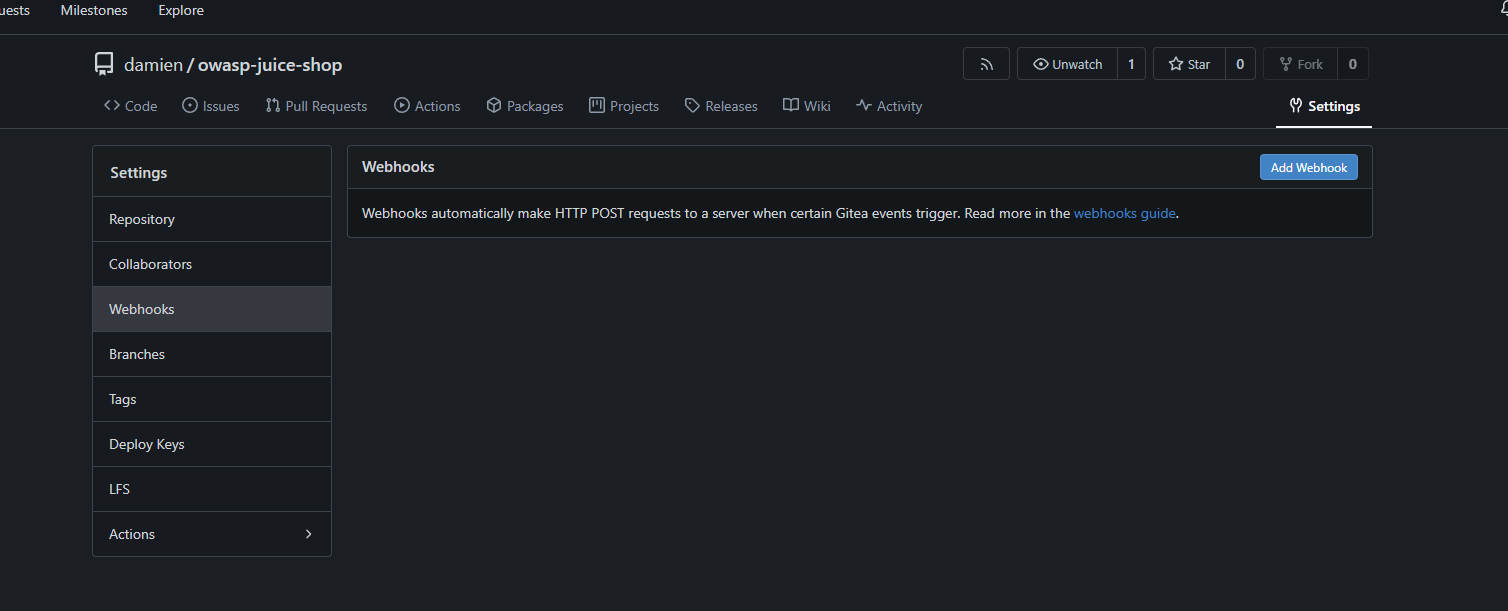
In Gitea, navigate to the project, click on Settings > Webhooks.
-
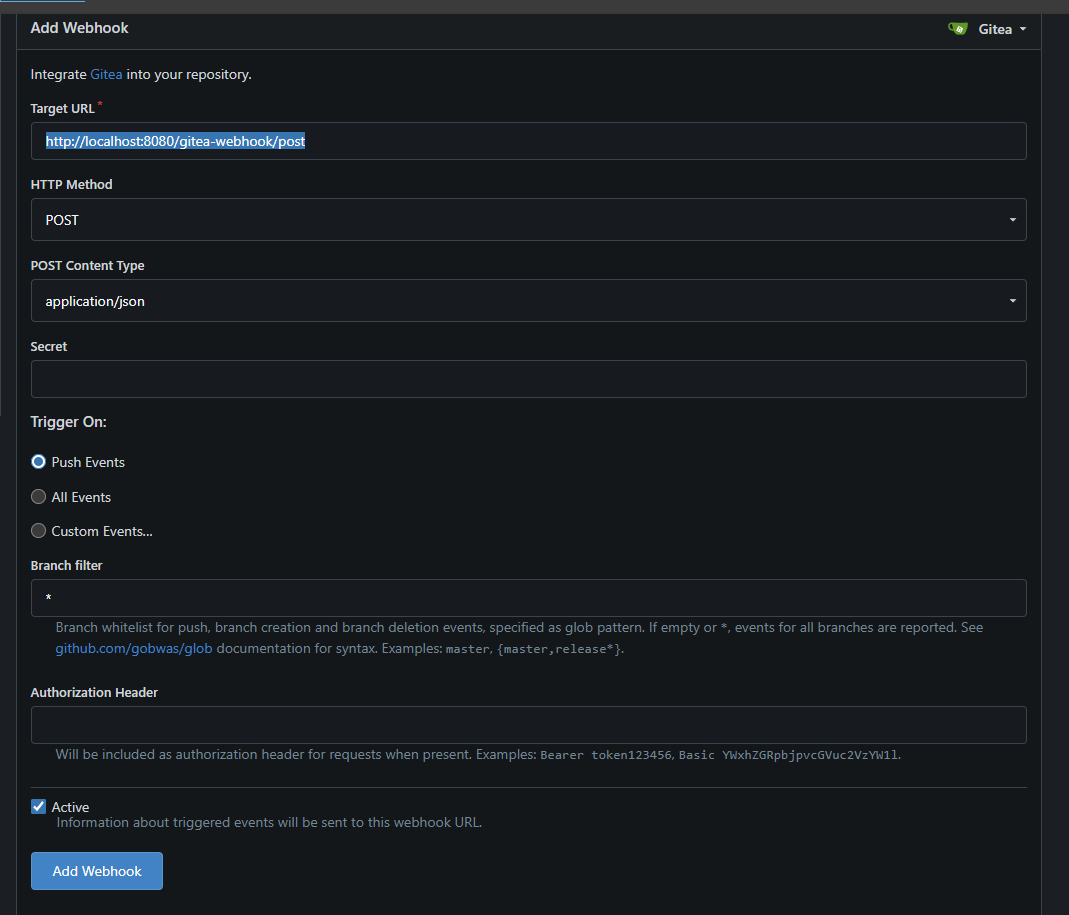
Click Add Webhook, then select Gitea. Fill out the form:
- URL:
<http://localhost:8080/gitea-webhook/post> - Method:
POST - Content Type:
application/json - Branch filter:
*
- URL:
-
Click Add Webhook to save the configuration.
Step 5: Configure SSH Keys
-
On your local machine (DSB Hub), generate an SSH key pair:
ssh-keygen -t rsa -b 4096 -C "jenkins@dsb-hub.com"Generating public/private rsa key pair.
Enter file in which to save the key (/home/<your_username>/.ssh/id_rsa):
Enter passphrase (empty for no passphrase):
Enter same passphrase again:
Your identification has been saved in /home/<your_username>/.ssh/id_rsa
Your public key has been saved in /home/<your_username>/.ssh/id_rsa.pub
The key fingerprint is:
SHA256:iIitv6/AYHsTTND7ooLJtG0M2NZrOWMer7E0E6hZ8XI jenkins@dsb-hub.com
The key's randomart image is: -
Copy the public key to your remote server:
ssh-copy-id <your_username>@dsb-node-01.local -
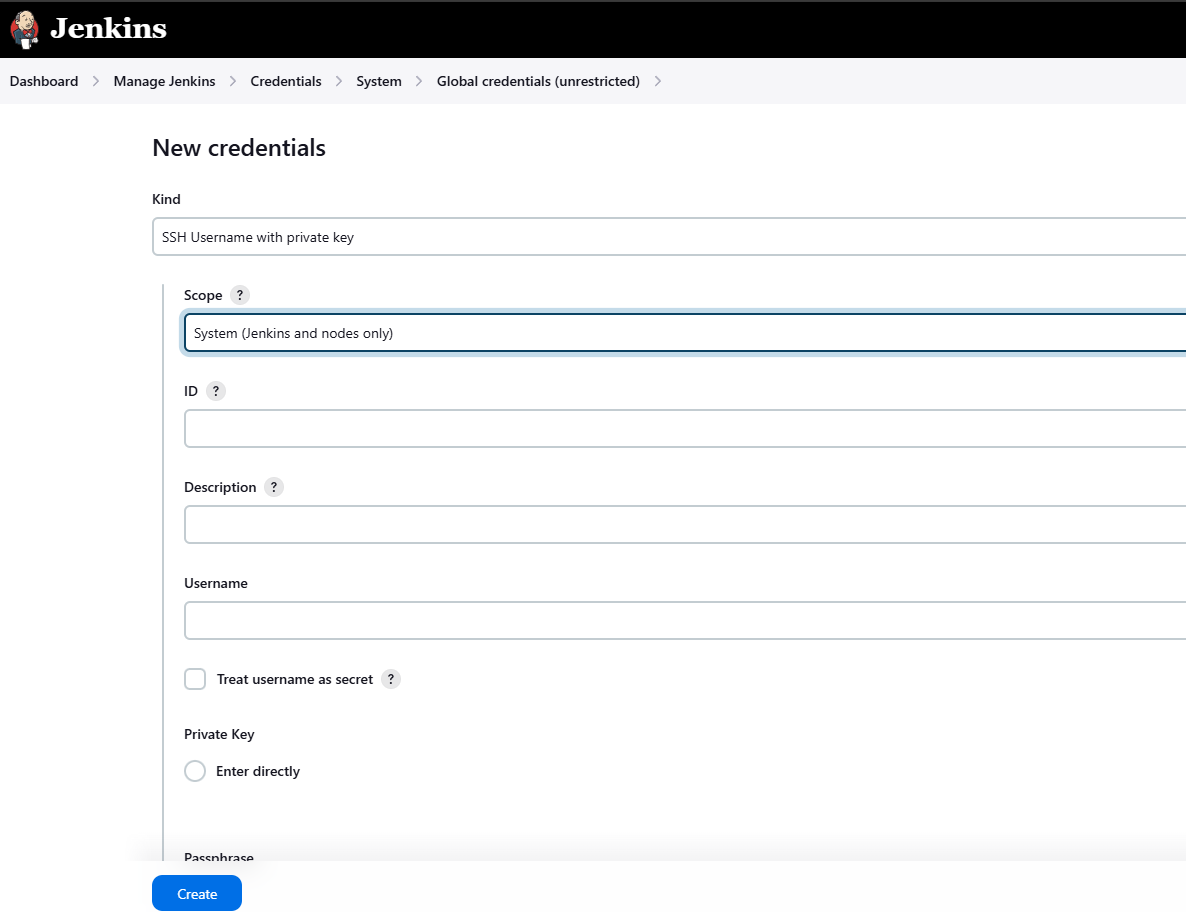
In Jenkins, go to Manage Jenkins > Credentials > System > Global Credentials (unrestricted). Select Add Credentials and choose SSH Username with private key.
-
Fill out the form and hit Create to store your SSH credentials.
Conclusion
You've now successfully set up a Jenkins pipeline for the OWASP Juice Shop project with Gitea, SonarQube, and Docker integration. Your pipeline is configured to handle code quality checks, security scans, and deployments, ensuring that your application maintains a high standard throughout the development lifecycle.